Building a raised deck can not only add value to your home, but also provide a beautiful outdoor space for entertaining or relaxation. However, constructing an elevated deck may seem like a daunting task for those without much experience in carpentry or construction. But fear not! With the right tools and techniques, you too can master the art of building an elevated deck in just 5 easy steps. In this blog post, we will guide you through the process of creating a raised deck that will elevate your outdoor living experience. So let’s get started and turn your backyard into a stunning oasis!
Understand the Importance of Planning and Preparing
When it comes to building a raised deck, understanding the importance of planning and preparing cannot be overstated. Taking the time to carefully plan out your project and gather the necessary materials will set you up for success and ensure that your deck is safe, sturdy, and visually appealing.
First and foremost, you’ll want to determine the size and design of your raised deck. Consider the purpose of your deck and how you envision using it. Will it be a space for entertaining large groups or a more intimate area for relaxation? Once you have a clear idea of your deck’s purpose, you can begin designing and sketching out your plans.
Next, you’ll need to take into account any local building codes or regulations that may dictate the size and height of your deck. This is an important step to ensure that your deck is compliant and safe.

Once you have your design in place, it’s time to prepare the site for construction. This involves clearing the area and ensuring that the ground is level. It’s also important to consider any nearby trees or structures that may impact the construction process.
One of the most critical aspects of planning and preparing for a raised deck is the foundation. The footings, or support structures, need to be properly installed to ensure the stability and longevity of your deck. This may require digging holes and pouring concrete to create a solid base for your deck.
Lastly, take the time to gather all the necessary materials and tools before you begin construction. This includes everything from the decking boards and joists to the screws and hardware for attachment. Having all the materials on hand will prevent any delays or interruptions during the construction process.
By taking the time to plan and prepare, you’ll set yourself up for a smooth and successful raised deck project. With a solid foundation and a well-designed plan in place, you can confidently move on to the next step in building your elevated deck.
Lay a Solid Foundation for Your Raised Deck
 Laying a solid foundation is the crucial first step in building your raised deck. This foundation provides the stability and support needed for your deck to withstand the test of time. Whether you are constructing an above ground deck or a high deck, the process for laying the foundation remains the same.
The first step is to use a mason’s line and batter boards to lay out the perimeter and mark the location for each footing. You can use a precast concrete footing or mix your own concrete and pour it out into a cardboard form, but for these types of footings you will need to dig a hole that’s deeper than the frost line and in some parts of the country it is more than 4 ft. From my personal experience I use a different type of footing it’s called a pin pile system. It requires a much smaller hole about 18 by 18 by 12 in deep. The top of the footing is placed into the hole and four bearing rods are driven into the ground using a demolition hammer. The next step is to secure the post basis to the footing and installing planned posts.
A raised deck is attached to the house by a ledger and supported on the opposite end by posts set on top of piers. The terms “piers” and “footings” are often used interchangeably though they are technically not the same thing. Piers transfer the deck’s weight into the soil. Footings spread the weight out over a larger area.
By laying a solid foundation, you are setting the stage for a structurally sound and durable deck. With this critical step complete, you can confidently move on to framing your deck and bringing your vision to life.
Frame Your Raised Deck with Precision and Care
Once you have laid a solid foundation for your raised deck, and installed posts to support raised deck it’s time to move on to the next crucial step: framing your deck with precision and care. The frame of your deck provides the structure and support that will ensure its longevity and durability. With the right techniques and attention to detail, you can create a frame that is not only sturdy but also visually appealing.
To begin framing your raised deck, you’ll first need to determine the layout of your joists. These are the horizontal beams that will support the decking boards. Measure and mark the positions of each joist, ensuring that they are evenly spaced and aligned.

Next, you’ll want to install the rim joists, which will form the outer edges of your deck. These joists will provide additional support and stability. Carefully measure and cut the rim joists to the appropriate length, making sure they fit snugly against the support posts.
With the rim joists in place, you can then install the interior joists. These joists should be spaced according to your deck design and local building codes. Use joist hangers to securely attach the joists to the support posts and rim joists.
As you frame your above ground deck, it’s important to continually check for level and square. Use a level to ensure that each joist is perfectly horizontal, and a square to ensure that the corners are at 90-degree angles.
Once your frame is complete, take the time to double-check all connections and ensure that everything is secure. A properly framed deck will provide the necessary strength and stability for your elevated outdoor space.
By framing your raised deck with precision and care, you can create a structure that will withstand the elements and bring your vision to life. With this step complete, you are one step closer to enjoying your beautiful, elevated oasis.
Install the Decking and Railing for Safety and Style

Now that you have laid a solid foundation and framed your raised deck with precision, it’s time to move on to the exciting part – installing the decking and railing for safety and style. This step will bring your deck to life and create a visually appealing outdoor space for you to enjoy.
To start, you’ll want to carefully measure and cut the decking boards to fit your deck’s dimensions. Whether you choose natural wood or composite decking, make sure to select high-quality materials that are durable and resistant to weathering. Begin by attaching the first board at one end of the deck, ensuring that it is level and properly aligned. Then, proceed to secure each subsequent board with screws or nails, leaving a small gap between each for water drainage.
Next, it’s time to install the railing for added safety and aesthetics. Measure and cut the railing posts to the desired height, making sure they are evenly spaced along the deck perimeter. Attach the posts securely to the rim joists or support posts, ensuring they are plumb and level. Then, attach the top and bottom railings to the posts, followed by the balusters or spindles. Finally, add any finishing touches, such as decorative caps or trim, to enhance the overall look of your deck.
When installing the decking and railing, it’s important to prioritize safety. Make sure all fasteners are properly secured and check for any sharp edges or protruding nails. Additionally, consider adding non-slip coatings or treads to prevent accidents, especially if your deck is an above ground deck that may be prone to moisture.
By carefully installing the decking and railing, you can create a safe and stylish outdoor space that will be the envy of your neighbors. Whether you envision hosting outdoor gatherings or simply relaxing with a book, the decking and railing will provide the finishing touches to elevate your raised deck to new heights.
Preserve Your Elevated Deck for Long-Lasting Beauty and Function
Preserving your elevated deck is essential to ensure its long-lasting beauty and functionality. By taking a few simple steps, you can protect your investment and enjoy your outdoor oasis for years to come.
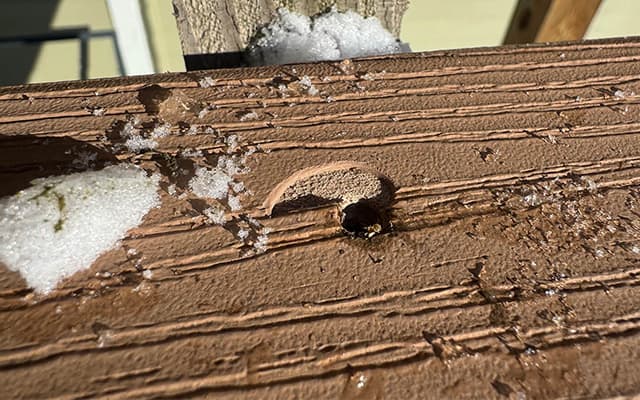
First and foremost, regularly inspect your above ground deck for any signs of wear or damage. Check for loose boards, protruding nails, or splintered wood. Address any issues promptly to prevent further deterioration and ensure the safety of your elevated deck.

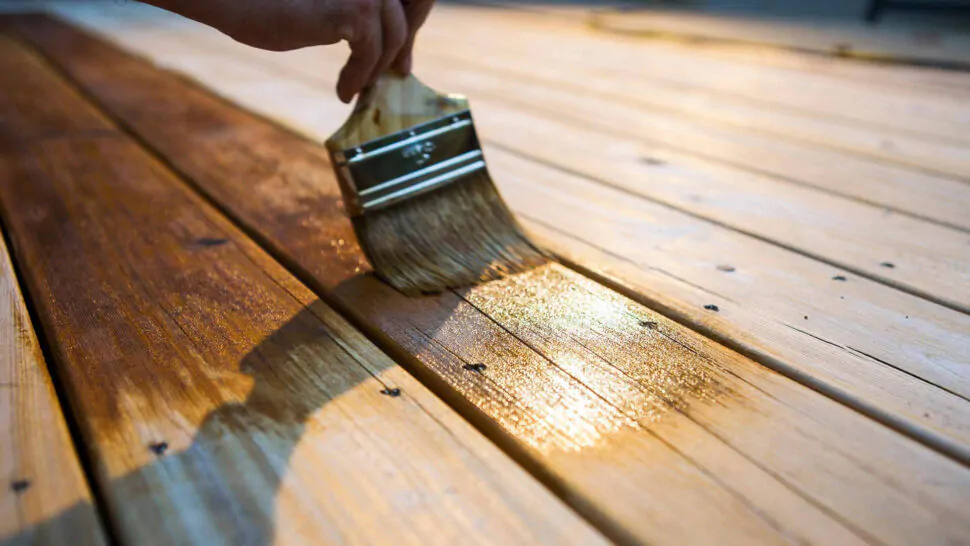
Next, it’s crucial to protect your deck from the elements. Apply a waterproof sealant or stain to prevent water damage, rot, and fading caused by UV rays. Be sure to choose a product specifically designed for the type of decking material you have, whether it’s natural wood or composite.
Cleaning your high deck regularly is also important to maintain its beauty. Sweep away debris, such as leaves and dirt, and use a mild detergent and water to scrub away any stains or discoloration. Avoid using harsh chemicals or power washers, as they can damage the surface of your elevated deck.
Lastly, consider adding furniture covers or using outdoor rugs to protect your elevated deck from furniture scratches or stains. Regularly rearrange your furniture to prevent the build-up of dirt or moisture underneath.
By following these simple steps, you can preserve the beauty and functionality of your raised deck, ensuring that it remains a stunning outdoor retreat for years to come. So sit back, relax, and enjoy the fruits of your labor!